I don't normally post about upcoming events (because there are plenty of sites that do, and do you really need to hear about them yet again from me?) but some of my favorite Boston food events are coming up, and you really should be there for them.
Taste of the Nation Boston
This is THE greatest food event in the city, hands down. Held at the Hynes Convention Center, it's table after table of little bites from some of the best restaurants in the area, as well as wines and cocktails. In fact, it's easy to get full before you've tried everything, but it's still worth giving it a go. It seems a little perverse to raise money for Share Our Strength, dedicated to ending childhood hunger in America, by eating copious amounts of food, but that takes away the sting of the $95 ticket price (I'd recommend going for the $150 VIP ticket, though - you get in an hour earlier, and you have access to the VIP room with additional treats and comfy seating, plus giving a little more to SOS will help balance out all the eating). This year, the event will be held on April 19th, from 6pm (VIP tickets)/7pm (regular tickets) until 9:30. Now through March 30th, use the code "restweek20" for a 20% discount on the ticket here (so you really have no excuse not to splurge on the VIP ticket). (Want more info? See my 2009 and 2010 recaps!)
Chocolate Madness
A food sampling event that is all about CHOCOLATE! What's not to love? Some of the area's top bakers and chocolatiers try to wow the crowd with their confections. You'll leave wanting a slice of pizza to take the edge off the sugar rush, but man, is that sugar rush worth it. The event is sponsored by NARAL Pro-Choice Massachusetts, and this year's event will take place on April 24th from 7:30pm to 9pm at the Cyclorama in the South End. Buy your tickets here. (Want more info? See my 2010 recap!)
PAX East
No, I know this isn't a food event. PAX is a huge gamer convention, now in it's third year in Boston (PAX Prime is held in Seattle in the fall). This is the first year, however, that I have joined the Cookie Brigade. The Cookie Brigade is one of the many groups which raise money for Child's Play, an awesome charity that brings toys and games to kids in hospitals. They bake cookies of all kinds and give them to fellow PAXers in exchange for donations (you don't have to donate for a cookie, but most people at least scrounge up some change). Post-PAX, I should have at least one new recipe to post here (and that will give me a reason to bore you with all my PAX stories as well). (I was first introduced to potato chip cookies through the Cookie Brigade. Make them, they're amazing!) (Also, see photos from PAX 2010 here. Apparently I didn't take photos last year?)
Tuesday, March 27, 2012
Wednesday, March 14, 2012
Pi Day for Ron

My brother Ron, however, loved it. At his last job, he had instituted Pi Day festivities, sending out invites months ahead and rallying everyone to join in on a silly mid-week celebration. In fact, he loved anything quirky or odd or just plain stupid like Pi Day. That's just the kind of guy he was.
Ron passed away suddenly last year, and pretty much nothing has been right since. He was one of my best friends, and I think he was finally starting to see me as an adult and not his stupid kid sister. He was the one who was constantly finding things to share with me - YouTube videos, new TV shows, weird catchphrases - and this past year has been awkward trying to find and enjoy these things on my own. I've been left with a lot of sad memories, which I know he would have hated.
Pi Day, though. That's a thing he loved for no real reason other than it was quirky. It's something I can be damned sure I'm going to celebrate for the rest of my life because it made him happy. And if pie can't fix things, even just for a little while, then I don't know what else can.
Because I'd much rather remember Ron on a day like today, for reasons like pie.
Bacon Chocolate Cream Pie
1 1/2 cups crushed Oreos (about 15 cookies broken in a food processor)
3 Tbsp butter, melted
1 pint heavy cream
1 Tbsp powdered sugar
1 tsp vanilla paste
1 package chocolate pudding, prepared as directed
5 pieces candied bacon, chopped
Mix together crushed oreos and butter until all the crumbs are moist. Gently pat into the bottom and sides of a pie dish. Refrigerate until ready to use.
In a mixer, whip heavy cream, powdered sugar, and vanilla until soft peaks form. Don't overwhip the cream. Gently fold half the whipped cream into the pudding and pour into the prepared pie dish. Top with the remaining whipped cream and decorate with the chopped bacon. Chill before serving.
Friday, February 24, 2012
Jarlsberg Monkey Bread

Can you believe that there are people out there who haven't yet tried monkey bread?! (Unless, of course, you are one of those people. Then I guess you don't know what you're missing.) When I told my friends that I had been invited to create a dish with Jarlsberg Dip for their 29 Ways to Leap into Jarlsberg Dip promotion and giveaway and that my dish would be monkey bread, I got more than one blank stare in return.
First, they were confused by Jarlsberg Dip (as was I, before I made this dish). It's a creamy concoction featuring the wonderfully nutty and subtle Jarlsberg cheese. It's just starting to pop up in stores. I used the dip plus regular Jarlsberg cheese in my dish.
And then, more horrifyingly, they were confused by the term "monkey bread." They wanted to know why it was called that, and I couldn't give them a clear answer. (The Internets didn't help me here, either.) Once I put this bad boy in the oven and they started to smell it as it baked, though, they didn't care about the name anymore.
There was pretty much no talking after I pulled this out of the oven (unless you count the mumbles asking for the plate to be passed around the table again). I still don't think I've adequately answered their questions about the term monkey bread...
One note: When I made this, I only sprinkled some of the grated Jarlsberg in the bottom of the pan. When it came time to eat, the extra-cheesy bits were my favorite, and I was sad that I hadn't incorporated more into the final dish. Below I have amended my recipe to include more grated cheese, which would make your monkey bread look a little different than mine.

Jarlsberg Monkey Bread
4 Tbsp butter
2 cloves garlic, sliced
2 lbs pizza dough (I used store-bought)
1 package Jarlsberg Dip
3-4 ounces Jarlsberg cheese, grated
In a small pan, heat butter over medium heat until melted. Add garlic and heat until garlic begins to brown. Remove from heat and cool slightly. Brush interior of a bundt pan with garlic butter and set aside.
Divide dough into even pieces about the size of a golf ball. Flatten each ball and place a small dollop of Jarlsberg Dip in the center. Pinch together the edges of the dough around the dip to seal closed. Brush with melted butter and roll in grated cheese before positioning in the prepared bundt pan. Repeat with remaining dough. Once all the dough has been used, cover the pan and let rest on the counter for 30-60 minutes.
While the monkey bread is resting, preheat the oven to 400°. Bake for 25-35 minutes, or until the top is nicely golden. The monkey bread will rise a lot in the oven. Cool slightly before inverting onto a plate. Serve hot!

Jarlsberg wants you to Leap into Jarlsberg Dip too by sharing how you would use Jarlsberg Dip. The winner of the giveaway will win a tailgate tote stocked with Jarlsberg Lite Cheese, new Jarlsberg Cheese Dip, Snofrisk (a Norwegian style cream cheese), crispbreads, honey cremes, and honey vinegar. More details are available on their website.
Full Disclosure note: I was compensated for my time and groceries by Jarlsberg, but my opinions are all mine.
Tuesday, January 31, 2012
Fried Olive Salad Toppers

I followed Fake Ginger's recipe, subbing in feta for roquefort and adding a small oregano leaf with the cheese. I ate a few of these straight out of the fryer and of course loved them, but they needed something. I grabbed some arugula from the fridge and tossed it lightly with a little lemon vinaigrette (basically just 1 part lemon juice, 2 parts olive oil), then perched a few olives on top. What a perfect match! The bitter greens stood up to the saltiness of the olives, the tender leaves contrasted with the crispiness of the fried bits, and the unctuous of the olive oil and the olives tied everything together. So while these make a very tasty amuse bouche as Fake Ginger intended, I loved them far more as delicious little croutons on my salad.
Cheese-Stuffed Olives
1 can Lindsay black olives, drained and patted dry
2 ounces feta
handful small oregano leaves
1 cup flour
1 egg, beaten
1 cup panko breadcrumbs
about 2 cups canola or vegetable oil, for frying
Stuff each olive with a piece of feta and an oregano leaf. (If the cheese is very crumbly, just stuff in as much as you can.)
Heat oil in a tall-sided pot over medium heat. When the oil is hot, work a few olives at a time: roll in flour, dip in egg, then coat with panko before adding to the hot oil. Cook until golden on one side, then flip and cook until golden. Cool on a paper towel-lined plate. Repeat with the rest of the olives. Salt lightly before serving.
Sunday, January 29, 2012
Olive and Goat Cheese Pasta Salad

I know what you're thinking - that's not a photo of pasta salad. You're right, because when I started cooking, I wasn't aiming for pasta salad. If you can't have some flexibility in the kitchen, you're in trouble.
While going through January's recipes over at Kitchen PLAY sponsored by Lindsay Olives, I wanted to cook just about all of them. I'm a big olive fan, so they all looked good to me. And since I'm also a fan of anything wrapped in puff pastry, I opted to try the olive and goat cheese turnovers from Chez Us. Don't her photos of the turnovers look amazing?!
And yes, I did make the turnovers. I loved them - pillowy bites of salty olives and tangy goat cheese. I subbed in some red onion for the shallots, because that's what I had. I loved these and the sophistication they would bring to any dinner party. In fact, I might have to bring them to the next family gathering, as I know my family loves cheese wrapped in dough as much as I do.
But I had some filling leftover (I only used one box of puff pastry instead of two), and I wasn't going to let it go to waste. I was going to just spread it on crackers, but I didn't have any. But there was pasta! I boiled up a little bit of whole wheat pasta and tossed it with the cheese mixture and a little bit of the pasta water.
Oh my, what a wonderful pasta sauce this makes! I ate some warm and enjoyed it, but when I ate some cooled, I enjoyed it even more. This would be a perfect picnic dish (I mean, our weather has been so bizarrely warm that us New Englanders could even have a picnic right now), or even great for lunch at work.

Olive and Goat Cheese Pasta Salad inspired by Chez Us
2 Tbsp olive oil
1/2 red onion, minced
1 can Lindsay green olives, drained and minced
1 can Lindsay black olives, drained and minced
zest of 1 lemon
handful of fresh oregano, minced
black pepper
10 ounces goat cheese
1 box small pasta (like rotini)
In a medium pan, heat olive oil over medium heat. Add onion and saute until soft, about 3 minutes. Add olives and cook about 5 minutes, stirring occasionally. Remove from heat and add lemon zest, oregano, and black pepper to taste. Let cool slightly, then stir in goat cheese until well combined.
Cook pasta according to box. Mix the pasta and the cheese mixture until well combined. Add a little of the pasta water if the cheese is too clumpy. Refrigerate before serving.
Monday, January 16, 2012
Vampire Slayer Dip

I hate yogurt. Like, really hate it. I know that this, along with my dislike of pilaf and paklava, makes me a bad Armenian, but I can't help it. It's just gross.
But sometimes (like after taking antibiotics), yogurt is a must. I can stand the stuff as long as it doesn't taste like yogurt, and usually a strong dose of garlic (like in tzatziki) will do it. I had already made one batch of tzatziki, though, so I needed another way to incorporate garlic and yogurt. How about two heads of garlic and two onions? If that couldn't stop the yogurt flavor, nothing could.
Of course, all that garlic can also stop vampires. So this dip will not only help your stomach feel better, it will also save you from an untimely death due to vampire bites. You can thank me later.
Vampire Slayer Dip
1 large (or 2 small) head of garlic
1 sweet onion
1 yellow onion
olive oil
2 cups Greek yogurt
handful of parsley
juice of 1/2 lemon
salt
pepper
Preheat oven to 400°. Remove loose papery layers from garlic head and cut off the top 1/4 inch. Place garlic in the middle of a sheet of tin foil. Top with a little bit of olive oil, wrap tightly in foil, and bake for 30-45 minutes (until cloves are soft). Let cool, then squeeze garlic cloves out of their papery shells.
Slice onions very thin. Heat a tablespoon or so of olive oil in a large pan over medium heat, then add onions. Cook about 30 minutes, stirring frequently, until onions are a deep amber color. Onions may need a little more olive oil as they cook. Cool before using.
Add cooled garlic and onions to a medium bowl, reserving about 1/4 of the onions for later. Add yogurt, then blend (either in a blender or with an immersion blender) until smooth. Add remaining onions and a handful of parsley leaves and blend lightly so there are still pieces visible. Add lemon juice, salt, and pepper to taste, and stir to combine. Make sure everyone eats at least a little bit so you don't knock anyone out with your breath.
Monday, January 9, 2012
From Austin to Boston and Back Again

I love getting gifts in the mail. I mean, who doesn't? So when the Boston Food Bloggers and the Austin Food Blogger Alliance teamed up before the holidays for a little cross-city swapping, you know I was in for the ride.
I went to Austin a few years ago for a conference, and while I didn't get to see an awful lot of the city, I loved what I did see. I ate more barbecue than I thought possible at The Salt Lick, spent a fair amount of time browsing in Austin Books & Comics, somehow managed to go to both Cornucopia (for awesome popcorn) and Walton's Fancy and Bakery (for baked goods) about once a day, and bought some crazy things at the City-Wide Garage Sale that now adorn my rooms. I couldn't help but wonder what magical items I would get from Texas.
But first, I had to package up my goodies! I shopped around for some of my absolute favorite local items, like Sweet Sloops from Harbor Sweets, a few different varieties of Q's Nuts, and Little Lad's Herbal Popcorn (the herbs are dill and nutritional yeast). I also added some local honey (which I bought on tap from Follow the Honey), some olive oil from Central Bottle, some chocolate-covered cranberries, and some homemade chocolate peppermint cookies that I had made for the Food Blogger Cookie Swap. Of course, like just about everyone else in the ATXBOS swap, I included a copy of Edible Boston, and I also threw in a farmers' market shopping list pad. I tried to get the package out the door as early as possible because I knew the Christmas season would be so hectic.

Wednesday, January 4, 2012
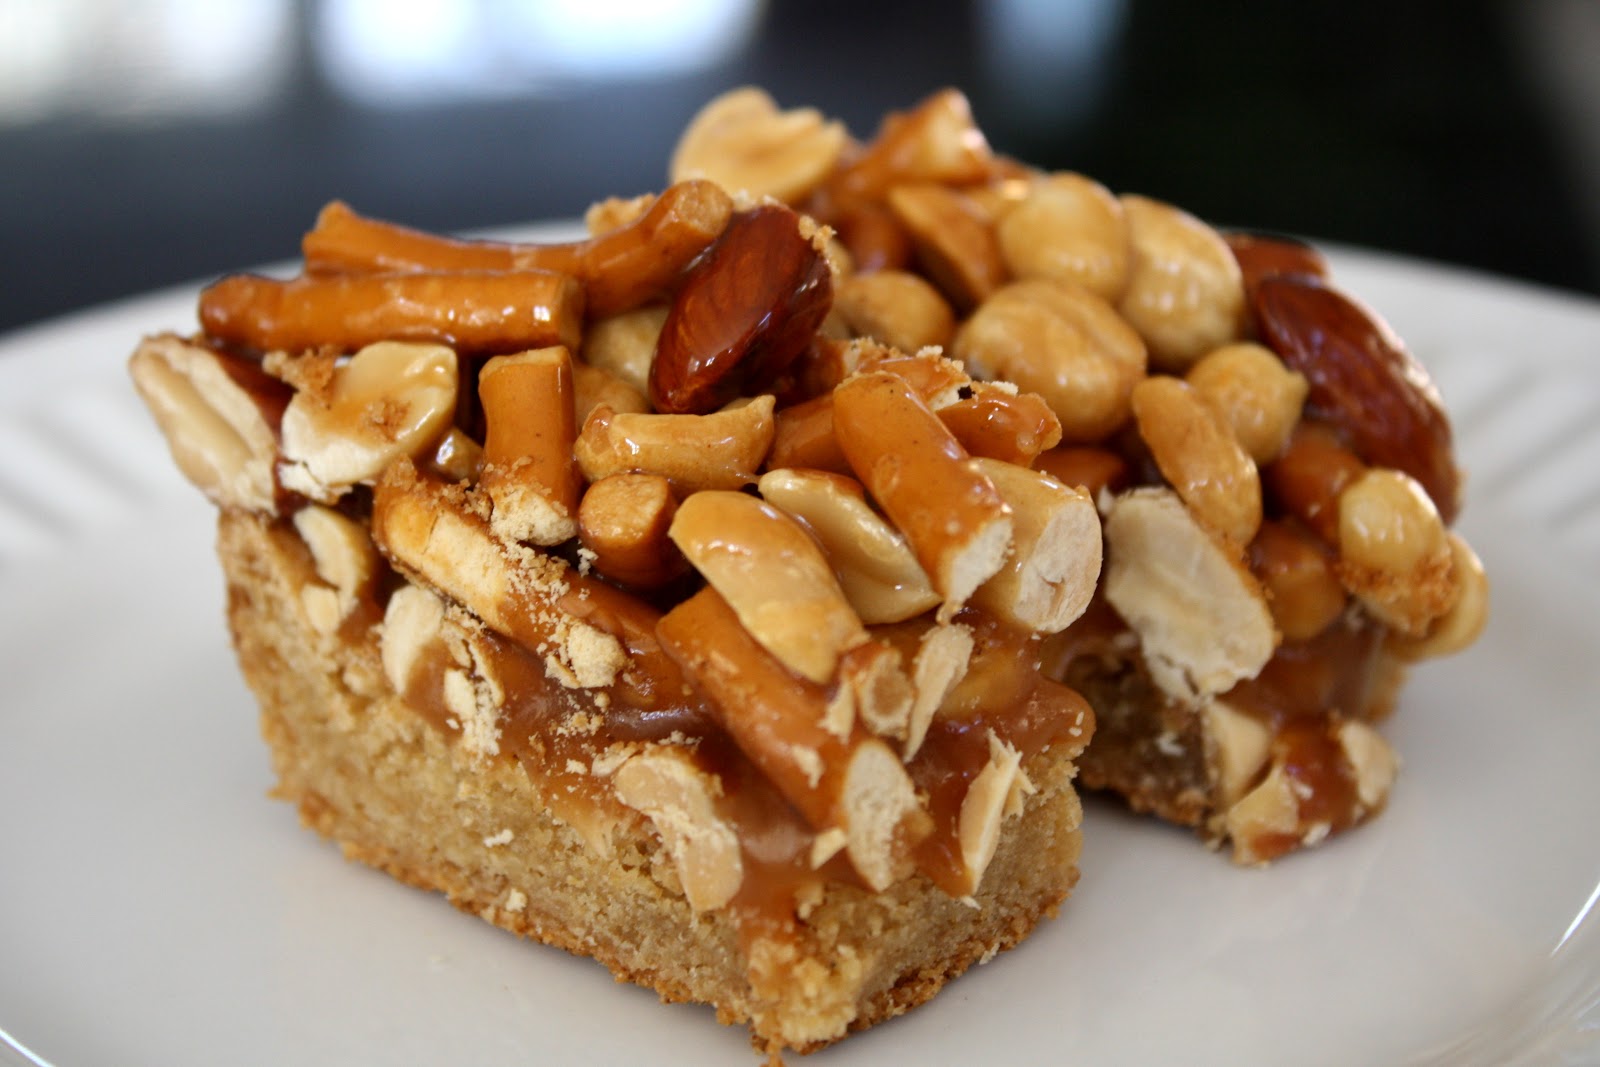
Caramel Nut Bars

Have you ever looked at a recipe and known - just KNOWN - that you'd love it? I like to think that I feel that way often, but in reality, after executing the recipe (maybe not to the T, but pretty damn close), I'm disappointed. I was prepared for that to be the way with the Butterscotch Blondie Bars with Peanut-Pretzel Caramel (they really couldn't have come up with a shorter name?) in the December 2011 Bon Appetit. I added them to my list of holiday baking, making sure I had plenty of cookies that were guaranteed to be tasty, and I set to baking.
And holy CRAP, these things are good! They're a nice mix of sweet and salty (but not too salty), crunchy and chewy, love and more love. I changed the recipe a little bit (by adding almonds), and I would change it further to include more pretzels (I have done so in the recipe below). 2011 apparently was the year I became confident making caramel, and this was the perfect way to end the year on that account.
As far as serving goes, I ended cutting these up into tiny pieces because it's so rich. I originally cut 36 or 40 bars from the 13x9 pan, and I doubt I could have eaten one in a go. Cutting them up even further made them last throughout the holiday, as well.
Caramel Nut Bars (adapted from Bon Appetit)
Blondie bar
1 1/2 cups flour
2 tsp baking powder
1 tsp kosher salt
1 1/2 sticks (3/4 cup) unsalted butter
2 cups packed brown sugar
2 eggs
1 tsp vanilla extract
Preheat oven to 350°. Line a 13x9 baking pan with parchment paper, leaving an overhang so you can pull the bars out easily later. Whisk together flour, baking powder, and salt and set aside.
Heat butter in a medium pan over medium heat, stirring until browned bits form at the bottom of the pan, about 7-8 minutes. Transfer to a large bowl (or bowl of a stand mixer). Add brown sugar and beat until combined and the mixture looks like wet sand. Add eggs and vanilla and beat until fluffy. Add dry ingredients and beat until smooth. Spread batter evenly in the prepared pan - it will puff as it bakes, so don't worry if you think you're spreading it too thin.
Bake 20-25 minutes, until golden brown and edges pull away from the sides of the pan. Cool completely before moving on to the topping.
Caramel Nut Topping
2 cups sugar
1/2 cup water
1/4 cup honey
1/2 stick (1/4 cup) unsalted butter
1/2 cup heavy cream
4 cups roasted peanuts (or a mix of peanuts and almonds)
2 cups salted pretzels, coarsely crushed
In a large saucepan, stir together sugar and water over medium-low heat until sugar dissolves. Increase the heat and boil without stirring (seriously, hands off!) until caramel is a deep amber (or caramel, if you will). This always takes longer than I think it should, but I'd rather it take a long time than burn the caramel right off the bat. Add honey and return to a boil, stirring, for about a minute. Add butter and stir until melted. Add cream and whisk until smooth (maybe wear a pot holder because this will steam and bubble A LOT). Add nuts and pretzels and mix until everything is covered in caramel. Pour over cookie and press down evenly. Chill until cool, then remove from pan and cut into bite-size pieces. Store in the fridge but bring to room temperature before serving.
Wednesday, December 21, 2011
The King's Toddy, or My New Health Tonic

A few months ago, I was invited to the Boston launch of No. 3 Gin and The King's Ginger (a ginger liqueur) at Eastern Standard. I, of course, tried all the iterations of gin cocktails that were offered to me, but my favorite of the night was a simple hot toddy made with both No. 3 and King's Ginger. The King's Ginger especially was intriguing to me because it has a much better, richer, fuller ginger taste than the other ginger liqueur on the market. I couldn't wait to get a bottle for myself. Or I thought I couldn't. Instead, I forgot all about it.
Last week, though, after feeling sick for most of this month, I was reminded of the cocktails I had tried at the event, and I remembered just how much I had loved that hot toddy. I searched around for No. 3 and King's Ginger (eventually finding them at Downtown Wine and Spirits in Somerville) and got to work.
I've made these toddies a few times now, and it only takes a sip or two to feel its effects. Between stress at work (Christmas retail in a store with concrete floors is HELL) and whatever illness I have that won't go away, I'm definitely more tense than I should be, but a King's Toddy soothes like nothing else. The warmth coupled with the intoxicating ginger, the subtleties of the gin paired with lemon and honey all add up to love in a mug.
The King's Toddy
1 oz No. 3 Gin
3/4 oz fresh lemon juice
1/2 oz King's Ginger
tsp honey
In a mug, combine gin, lemon juice, ginger liqueur, and honey. Top with hot water and whisk to dissolve the honey. Garnish with lemon twist.
Monday, December 12, 2011
The Great Food Blogger Cookie Swap 2011 - Chocolate Peppermint Cookies

I had some trouble coming up with a recipe I wanted to use, but as soon as I tasted the Candy Cane Coal from Trader Joe's, I knew what I had to do. I used my favorite chocolate chip cookie recipe and simply swapped out the chocolate for the candy cane bits, and I had a perfectly festive cookie. I made these a little smaller than usual, so they were a little flatter and crispier, but just as tasty.
Now I just need to stock up on this candy so I can make sure I can make these cookies in the future!

Chocolate Peppermint Cookies
2 cups all-purpose flour
1/2 teaspoon baking soda
1/2 teaspoon salt
3/4 cup unsalted butter, melted
1 cup packed brown sugar
1/2 cup white sugar
2 teaspoons vanilla bean paste
1 egg
1 egg yolk
3-4 ounces chocolate-covered candy cane bits (like Trader Joe's Candy Cane Coal)
Preheat the oven to 325°. Line cookie sheets with parchment paper.
Sift the flour, salt and baking soda and set aside.
Mix the sugars and butter just until thoroughly mixed, then add egg, yolk and vanilla and mix until creamy. Add the sifted ingredients and mix until just blended. Stir in the candy can bits, then drop dough in heaping tablespoons on a cookie sheet, about 2 inches apart, and bake for 15-17 minutes until golden and puffed. Slide the sheet of parchment off the cookie sheets and let the cookies cool without disturbing them for a few minutes. Once they have cooled slightly, move the cookies to a cooling rack.
Friday, December 9, 2011
Friday I'm In Love... with Trader Joe's Candy Cane Coal

It's seeming like every Friday I'm In Love post is candy from Trader Joe's, and rightfully so. There are always new products every time I walk in, and I can't help but walk out with at least one new item to try. And Christmas time is an even better time for new products - you never know what kind of gifty thing you're going to find there.
Case in point: Candy Cane Coal. It's got kind of a stupid name, but I'll let that pass, because it tastes so damn good. The box is small (although I like the simple design of a fireplace) and holds about 3.5 ounces of the candy. Doesn't sound like much, but there's lots of flavor in each little bit. The candy is tiny bits of crispy candy cane covered in dark chocolate. That's, like, two of my favorite flavors in one food. How could I not love this?!
I've already eaten plenty of these straight, but I've also done a little baking with them as well. Stop back on Monday for the recipe. I'm thinking I might have to stockpile this stuff after Christmas because I don't want to not have this in my life.
Monday, November 21, 2011
Marge Simpson, Food Blogger
I am and always have been a huge fan of The Simpsons. Ralph Wiggum was included in my high school yearbook quote (he was also one of the first embroideries I ever did). In college, I taught two semesters of a class on The Simpsons and American society with a friend (the first semester, the class was only for freshmen, and 90% of the incoming class signed up to take it). There was a chunk of time when the show was just too bad to watch, but it has definitely been much, much better in the last few years. Like most fans, though, I can be a bit wary - current episodes are often hit or miss and are never as strong as the earlier seasons.
So when I heard that Marge was going to become a food blogger (even if only for one episode), I was a bit worried. Would Marge's new job be a success (pretzel wagon saleswoman) or a failure (erotic baker)? Would the writers just take the easy jabs, or would they actually pay enough attention to the culture to get it right?
I can happily say that they hit this episode, entitled The Food Wife, on the mark, even if it does pinpoint the pretentious nature of many food blogs a little too accurately. The basic story? Marge, Bart, and Lisa are driving in the car when it breaks down in Little Ethiopia, a previously unknown section of Springfield. They go into a restaurant and Marge (and the kids) are wowed by the food they try there. They meet a bunch of foodies, led by Comic Book Guy, who actually searched the restaurant out, and Marge is swiftly on her way to becoming a foodie. Marge, Bart, and Lisa start their own food blog, called The Three Mouthketeers, while Homer looks on. In fact, Homer seems to be firmly against food blogs or even trying new foods, saying things like "I don't eat anything new unless I've eaten it before" or "I don't want to think about food, I want to like it!" or "All the food in those pictures is poop by now." Marge and Homer are quickly and firmly on two very different sides of the debate.
The video above is by far the funniest part of the episode (I mean, who doesn't love a montage?!). Do a little freeze-framing and you can see Marge’s favorite food gadgets (Marshallow Puffer, Immersion Toaster, Raisin Re-graper, Industrial Tagine, Soup Ruler, Cranberry Pitcher, Banana Separator, Souffle Barometer, Pressure Curder, Convection Slurper) or Bart's 4-star review of The Burger Maestro ("An ostrich burger with buffalo mozzarella? It’s like a zoo exploded in my mouth!"). A spoof of Jay-Z's Empire State of Mind, the song name-checks chefs, food writers, cooking terms, and ethnic foods left and right. There's even a reprise of the song over the end credits that's even funnier than this version because it really gets down to the glamorous life of a blogger (We're bloggin' a food blog/ Setting up accounts for our users/ Using computers/ Most tweets every day, yo tweets every day/ Never give it four stars, ain't never give it four stars, maybe two, maybe three/ Moderating the comments/ Checking the page views, page views, page views).
Eventually, Marge and the kids get invited to dine at El Chemistri, a high-end and experimental restaurant in town. We see what I imagine is only a portion of the meal, but what a meal it is. It starts with mints placed in the mouth that vibrate when their table is ready. We see a deconstructed Caesar salad (romaine lettuce gel, egg yolk ice, crouton foam, and anchovy air), "Regret" (some kind of soup served on a pillow, which deflates when the soup is garnished with a single tear from the server's eye), Pork Chops 100 Ways, root vegetables "cooked in the perfect vacuum of outer space" ("They say you can't even understand parsnips until you've had zero-G parsnips"), and a doggie bag (woven from the silk of a blueberry-fed spider) of deconstructed apple pie (cue the ending of Ratatouille). You'd never think of Marge as the type of woman to try those dishes, so good for her!
My favorite moment of the episode (besides the song) was Homer's comment after watching the chef at El Chemistri make pine needle sorbet. He seems horrified by the very idea of pine needle sorbet - "Pine needle sorbet? Pine needle sorbet! My kids do not eat sorbet! They eat sherbet, and they pronounce it sherbert, and they wish it was ice cream!"
(My other favorite moment from the episode was not food related but reminded me of my father - Marge calls the kids "gang," and Bart shoots back "I hate it when grownups call kids 'gang.'" I hope you enjoyed that, Dad.)
If you could have one of Marge's favorite kitchen gadgets, which one would it be and why?
Friday, November 11, 2011
Friday I'm In Love... with Trader Joe's Dark Chocolate Bar with Caramel and Black Sea Salt

This is not a pretty chocolate bar, though. I know, I took about 50 pictures of it. One side of the bar is nice and smooth, but the opposite side, where the salt is sprinkled, is more unruly. Between the salt, which could stand to be distributed a lot more evenly, and holes where the caramel had oozed out a bit, it becomes clear that the reason Trader Joe's can sell this bar for a very, very reasonable $2 and something is because it's pretty hideous. This isn't something to give as a gift, as it will win no beauty pageants. But then, I'd have a hard time giving one away. I want to keep them all for myself.
Tuesday, November 8, 2011
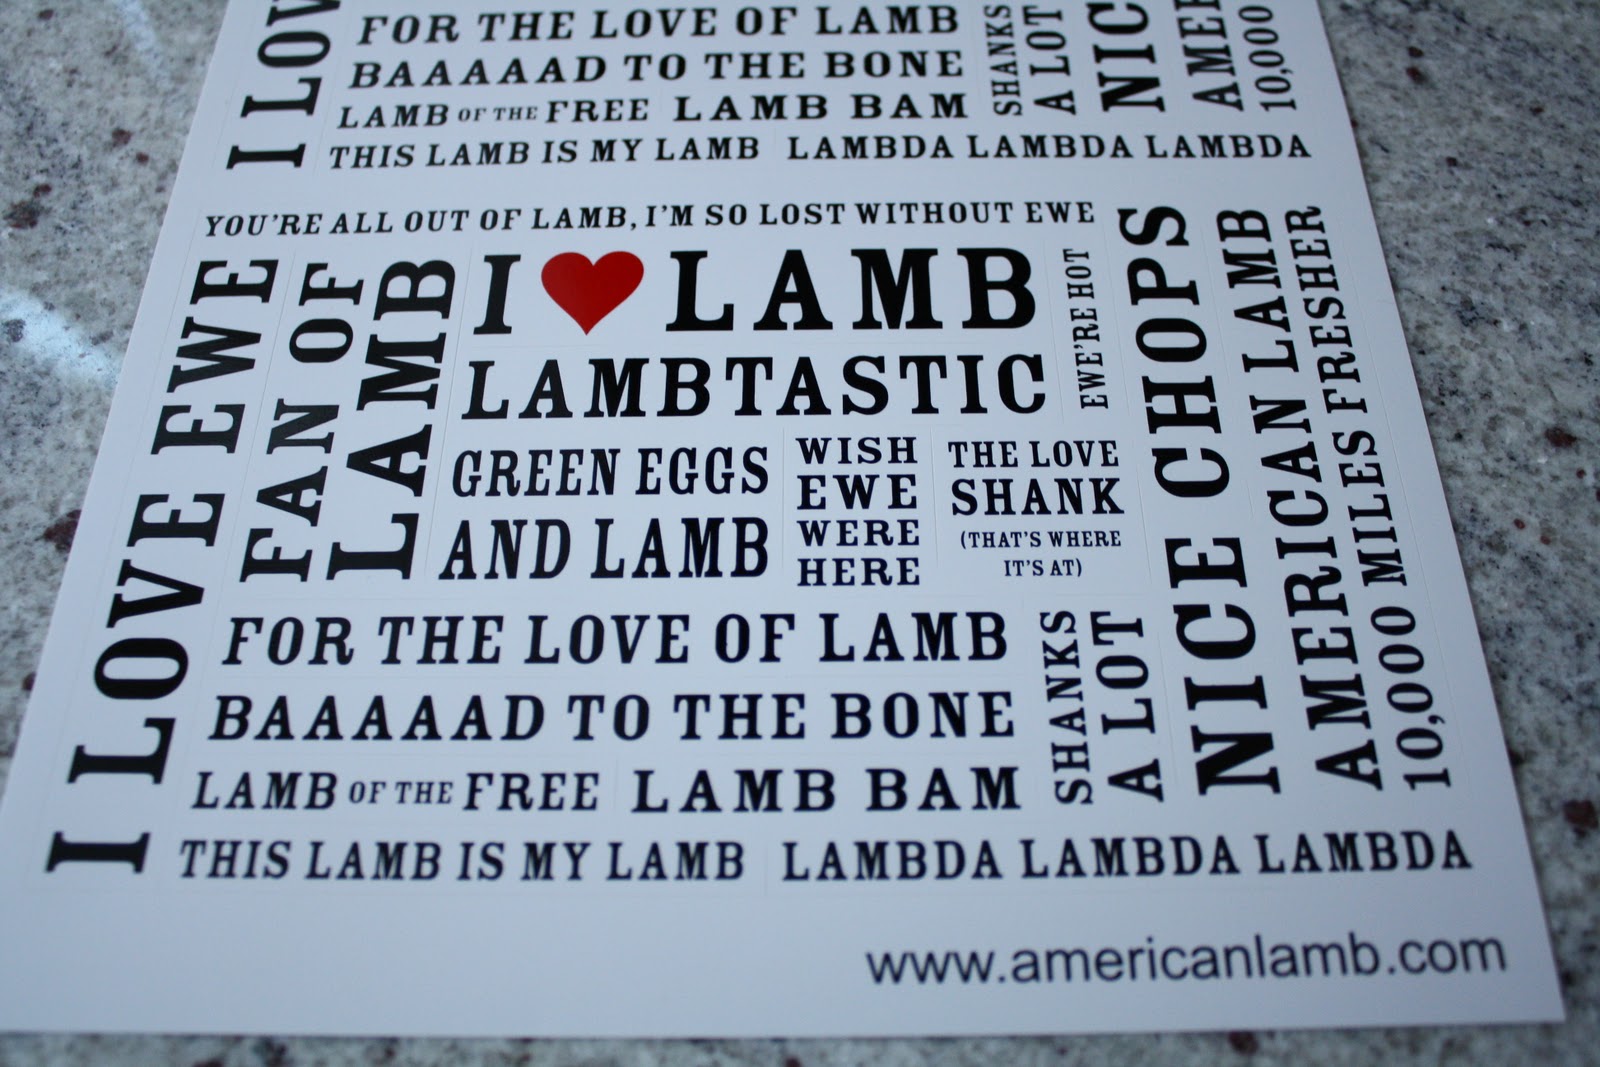
Lamb Pro-Am Finals

Sunday was the big day - the Lamb Pro-Am Finals! It was the first tasting-style event where my goal wasn't to make sure I hit every booth I could. Instead, I arrived early, met with Chef Jay Silva of Bambara, who walked me through the changes he had made to my dish, and then it was time to serve.
Since my original dish was a roast leg of lamb, Chef Silva had to change things around to make it something that could be served to 150 people in small servings. He created smaller roasts by cutting up the lamb, thus enabling each dish to get a perfect slice of meat and rice. He also used the rice mixture and some ground lamb to create little arancini, adding lots of crispiness to the dish. Pumpkin puree and a red wine reduction pulled the dish together. I was very pleased with his changes and how the final dish turned out. In fact, I'd be very happy to receive this dish in a restaurant. Or just a dish full of the arancini.
Sadly, we didn't win (although our dish was my favorite of the day - what, you think I wouldn't be bias?!). Robin of Doves and Figs and her partner Michael Scelfo of Russell House Tavern took home the prize.
I had a wonderful time participating in this event, completely unlike anything I'd ever done before. Hopefully there will be more Lamb Pro-Ams in the future, and we'll get to see more wonderful and creative lamb dishes. Many, many thanks to BostonChefs.com and to the American Lamb Board for setting all of this up - they both throw great parties, so keep an eye out for more from them both. In fact, BostonChefs Flavors of Fall is next week - it's a great way to see how restaurants respond to the change in seasons.
Sunday, November 6, 2011
Berry Bellinis and Warm Raspberry Brie

I headed to my friend Ann's house (where I do most of my cooking) and started prepping in the afternoon. The "party" started at 8, so we started mixing the drinks around just before, then settled in to a meal of appetizers and dessert. Five recipes were offered to us, and I cooked four of them (leaving out the wild rice, because I've never been a big fan of the stuff). We had a few rounds of berry bellinis, a fantastic dish of warm brie with raspberries and pistachios, roasted acorn squash with a raspberry sauce, and panna cotta topped with balsamic raspberries. We listened to the live chat on and off while discussing whatever geeky things were on our mind and stuffing our maws full of the brie (we polished off that dish in record time, especially impressive because one of the four of us doesn't even eat brie). When all was said and done, I came away with two recipes that I LOVED and intend to make again.
Berry Bellinis
1 oz St. Germaine (elderflower liqueur)
0.5 oz lemon juice
0.5 oz simple syrup
4 raspberries
3 oz dry sparkling wine
In a cocktail shaker, combine St. Germaine, lemon juice, simple syrup, and berries. Top with ice and shake vigorously. Pour champagne into a flute, then top with St. Germaine mixture. Garnish with a raspberry.
Warm Brie with Raspberries and Pistachios
1/2 cup shelled pistachios
1 small wheel of Brie, top rind sliced off
1/4 cup honey
1 tsp balsamic vinegar
1/2 tsp chopped fresh rosemary
1 package (6 ounces) raspberries
Preheat oven to 350°.
In a small saucepan, toast pistachios over medium heat, tossing occasionally so they don't burn. Transfer to a plate.
Place Brie, cut side up, on a small glass baking dish (I use a small pie dish, so it can go straight from the oven to the table). Bake until warm and top is softened but not oozing, about 15 minutes.
In a small saucepan over medium heat, stir together honey, vinegar, and rosemary. Add raspberries and pistachios and gently fold the sauce over them. Pour raspberry mixture over the top of the cheese and serve immediately (I like water crackers, my friends preferred slices of baguette).
Full Disclosure note: The berries were provided via free coupons from Driscolls. I paid for all the other ingredients, though - well, the ones I didn't swipe from Ann's pantry.
Saturday, October 29, 2011
Cthulhu Sticks

Every Halloween, my friend Ann and I throw a party, filled with candy, dry ice, costumes, pumpkins, and lots of good food. We always have a good time coming up with items that are both delicious and spooky. Last year, I came across an idea somewhere (probably in one of the many Halloween magazines we pore over) to make tentacle breadsticks. I used store-bought pizza dough and managed to make some vaguely squiggly breadsticks, which we immediately dubbed Cthulhu Sticks (what, we're not super geeky or anything).
I was pleased enough with my experiment last year to try making them again, but not pleased enough. Instead of going the pizza dough route, I found a recipe for grissini (those long, thin Italian breadsticks). The dough is pretty simple to put together and is fairly forgiving of being worked, plus I found countless tips online about using a pasta machine to roll out and cut grissini so that they're uniform (and last year, the tentacles were anything but uniform).
I am so much happier with how the Cthulhu Sticks turned out this year. I opted to color half the dough black (I used gel food coloring, but you could use squid ink if you want something more natural), which I think gives them a spooky feel. Sea salt on the black ones and poppy seeds on the white ones add a look of suckers to the tentacles, but you can add whatever toppings (or even mix something into the dough) that you'd like.

Cthulhu Sticks
1/2 cup warm water
1 package dry yeast
1 tsp sugar
1 3/4 cup flour, divided
2 Tbsp olive oil
1 tsp salt
optional: chopped herbs, food coloring, poppy seeds
Combine water, yeast, sugar, and 1/2 cup flour in a large bowl. Rest 10 minutes. Add remaining flour, oil, and salt (also any herbs or spices you could like. If coloring the entire batch, add food coloring now. Otherwise, wait until dough is more solid before kneading it in). Knead about 5 minutes, until dough is smooth and elastic. Place dough in a greased bowl, cover with plastic wrap, and let rise 1 hour.
Preheat oven to 400° and move oven rack to the top position.
Divide dough into four pieces. Using pasta roller, roll into a roughly 9x4 rectangle on the thickest or second-to-thickest setting. Cut with fettuccine cutter. Arrange grissini on parchment-lined baking sheets, keeping one end straight (so they can stand in a vase) and one end tentacle-y. Brush with olive oil and sprinkle on salt or additional toppings. Bake 8-10 minutes until golden (well, at least for the ones that aren't black) and cool on a wire rack.
To serve, arrange in a vase to get the full tentacle effect.
Wednesday, October 26, 2011
Moving on in the Lamb Pro-Am

Well, it's official! My pumpkin rice-stuffed lamb roast and I are moving on in the American Lamb Pro-Am! I have been teamed up with Chef Jay Silva of Bambara, and hopefully we'll have a bit of a home team advantage, because the Pro-Am event will be held at the Hotel Marlowe in Cambridge, where Bambara is located.
Tickets are $25 and can be purchased here. That includes samples from the four Pro-Am teams, plus all kinds of beer, wine, and cocktails and other tasty treats. Attendees also get to vote on their favorite dish, so of course I want my readers to come and vote for me ;) If it's anything like the other American Lamb events I've been to, it is well worth buying a ticket.
Hope to see you there!
Tuesday, October 25, 2011
Salted Caramel Apple Tart

Enter this delicious salted caramel apple tart. Caramel and apples just go together so perfectly. I would have made caramel apples, but, well, that's just an apple covered in caramel. Not different enough from a plain apple for my apple-exhaustion. For the tart, I made homemade caramel, but used store-bought pie dough (to even out the workload). It was so good, I had to make a second one (good thing the pie dough comes two to a box).
Salted Caramel
1 cup water
2 cups sugar
1 cup heavy cream, warmed in microwave, plus more for brushing
1/4 tsp salt
Pour the water into a large saucepan, then pour the sugar into the center of the pan. Heat over medium heat until sugar dissolves. Cook on high without stirring until golden brown (have cream warmed and waiting for this). Remove from heat and carefully whisk in cream (wearing an oven mitt helps - the caramel will release a lot of steam). Boil to thicken slightly (remember the caramel will thicken further as it cools), then stir in salt. Let cool before using.
Salted Caramel Apple Tart
1 large or 2 small apples (eating apples work better than baking apples), sliced very thin
salted caramel
pie dough (1 disk of store-bought or half of your favorite recipe)
sugar
Preheat oven to 450°.
Roll dough into a 1/4-inch thick circle. Arrange on a parchment-lined baking sheet. Spread caramel on dough, leaving an inch-wide margin around the edge. Lay apple slices overlapping in a fanned pattern around the dough (outer circle first, so the inner circle can overlap). Gently fold the edges of the dough up over the apples. Brush the top of the entire tart with heavy cream and sprinkle on some sugar. Place baking sheet in the center of the oven and bake for 20 minutes. Reduce heat to 375° and bake for another 15-20 minutes, or until the top of the tart is golden brown. Let cool before serving.
Tuesday, October 18, 2011
Vote in the Lamb Pro-Am
But now's the time I need you to do a little something for me. Head over to the Lamb Pro-Am site and give me a vote! I'm at the bottom of the list, right above the big "Cast Vote" button. You can't miss me.
How the voting works: Out of the ten fabulous blogs participating, the four with the top votes will move on to the live competition. Those four will be paired with local chefs Michael Scelfo (of Russell House Tavern), Jay Silva (of Bambara), Mark Orfaly (of Pigalle), and Jason Cheek (of KO Prime). They will cook with their chef and present their dish at the Lamb Pro-Am event on November 6th. You can buy tickets here, or enter to win a pair on the voting page.
Of course, there are some absolutely mouth-watering dishes in competition with me. So while I want you to vote for my pumpkin rice-stuffed lamb roast, take some time and visit the other competitors too. Everyone did a wonderful job adapting the competition to highlight their style of cooking.
The Lamb Burger from Boston Burger Blog - I love the use of pomegranate seeds on top!
Guinness Braised Lamb Poutine from the Small Boston Kitchen - Sweet potatoes + lamb = delicious
Three Peppers Lamb from Jacqueline Church - Don't look at me strangely when I say I wanted to lick the picture of her dish.
Autumn American Lamb Supper from Doves and Figs - The only other roast-for-roast-sake in the competition, and dear god, lamb fat cornbread!
Roast Lamb Tacos from Two Recipes - the zesty Mexican-inspired marinade for the meat sounds wonderful!
Moroccan Style Lamb Chapati from Just Add Cheese - More pumpkin, but in an entirely different format.
Lamb Potstickers from Umommy - Not one but TWO fantastic kinds of lamb dumplings.
Guatemalan Lamb Tacos from the Gringo Chapin - He humbly talks about street food, but I've never seen street food look that good.
Friday, October 14, 2011
Pumpkin Rice-Stuffed Lamb Roast

When Armenians say meat, they really mean lamb, and I can hardly think of a gathering of Armenians beyond my immediate family that hasn’t include at least one type of lamb dish. So when I was invited to participate in the inaugural Lamb Pro-Am, sponsored by the American Lamb Board and BostonChefs, I knew I would make an Armenian-inspired dish almost as quickly as I knew I would participate.
I was surprised at how fast I came up with a recipe for this challenge. We (me and 9 other Boston-area bloggers) were tasked with cooking a boneless leg, which ruled out any stew-like dish because there are better cuts for that. Immediately I thought of shish kebab – skewers of lamb (usually leg), marinated and grilled. But it was too simple (not to mention that Fall seems to have finally settled upon us with drizzly day after drizzly day). And then I remembered an often-talked-about dish that my grandmother used to make, and I KNEW.
My father’s mother passed away when I was very young, so I never got to experience her cooking, although my life has been filled with stories about her ruling over her kitchen. I spent a weekend this past summer with my horkur (Armenian for aunt, more specifically father’s sister), and after we baked treats that she remembered from her childhood, she gave me a copy of a cookbook she had written, which included many of her mother’s recipes.


One recipe jumped out at me. It consists of rice and pumpkin and onion and raisins, and that’s pretty much it. I had wanted to try it since hearing about it years before, and I knew that my other grandmother had made a similar dish, so it couldn’t be bad if both sides of my family had their own versions. But instead of just serving the pumpkin rice alongside the lamb, I decided to fill the lamb with it.
The rice was surprisingly quick and easy to put together. The only hardship is the chopping of the pumpkin and the onions. I know 3 onions sounds like a lot, but light a candle and get chopping – you really do need 3 onions. Trust me. And because I was planning on putting the rice inside the lamb, I diced the pumpkin up into small cubes; if you serve it just as a side dish, you can cut bigger cubes. Use any kind of pumpkin or winter squash you’d like (I used my favorite, buttercup squash). This can be made a day ahead if need be.
Pumpkin Rice
¼ cup olive oil
3 onions, minced
¾ cup rice
½ cup raisins
2 tsp salt
2 Tbsp sugar
2 cups water
2-pound squash, inside cleaned out, and diced
In a large pan, heat olive oil over medium heat. Add onions and cook until translucent, stirring often. Add rice, raisins, salt, and sugar, and stir to combine. Push mixture to one side of pan and lay down about a quarter of the diced pumpkin; move rice over the pumpkin and lay down another quarter on the other half of the pan. Even the rice out, then top with the remaining pumpkin. Add water, cover, and reduce heat to low. Let cook until rice and pumpkin are cooked through and tender, about half an hour. Stir together before using or serving.
Now, I’m no butcher. Butchers are trained and know what they’re doing with a cut of meat. Me, I just kind of hack at meat until it looks good enough. I lamely attempted to butterfly my leg of lamb, making sure to cut out the silverskin to ensure a tender roast. I definitely could have done a better job, but I also didn’t ruin the meat (whew!). If you give this recipe a shot (and don’t know what you’re doing, much like me), ask your butcher to butterfly the leg for you. You’ll be much happier.
Once the leg is butterflied, lay it meat side up (fat side down), sprinkle with a little salt, and lay some of the rice mixture evenly over it. There will be plenty of rice left – save it to serve with the meat later. Roll the meat up, trying not to squeeze out all the filling as you go, and tie it together to keep its shape (I found this video helpful, although it was more of a two-person job for me). Place it fat side up in a roasting pan and cook in a 350° oven until a thermometer inserted into the meat (make sure you avoid the rice filling!) reads 150°. Remove from oven, cover with foil, and let stand 10-15 minutes before cutting and serving. Reheat the rest of the rice to serve alongside – the pumpkin will mush a bit as you stir, making it appear more orange than it had before. The rice inside is a bit meaty and has imparted much of its sweetness to the meat, while the rest of the rice has a more pronounced pumpkin flavor, so it almost seems like two different rice dishes.


The rice got plenty of approval from my parents, who said it tasted just like they remembered, and the three of us devoured more lamb than we thought possible. Hopefully my grandmother would have approved as well.
Many thanks to the American Lamb Board and Boston Chefs, who provided me with this wonderful cut of meat. Please take a moment to vote for me here - the top four bloggers move on to the next round!
Subscribe to:
Comments (Atom)